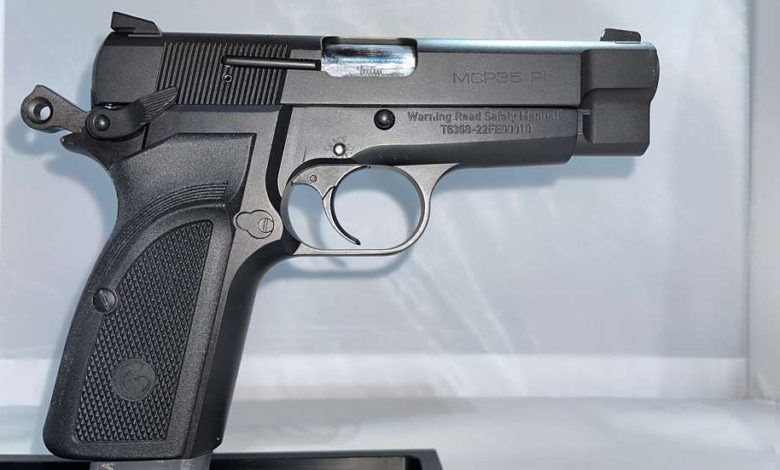
As firearm enthusiasts and shooters, it’s a challenge to broach the topic of guns without allowing things like personal preference to creep their way in because, individually speaking, we allow our previous experiences to influence our opinions. The problem is, they’re best suited for you—and you alone. While I admit being partial to certain brands of Browning Hi Power accessories and parts, my goal is to explain the rationale that led to the decisions, in an effort to help you form a similar list of your own.
By taking an objective look at the vital elements that comprise Ol’ Slabsides, the late gun guru/gunwriter, Col. Jeff Copper broke the pistol’s most-critical elements down by concluding the only elements a self-defense 1911 need are good sights, a good trigger and utter reliability. In the words of Thomas Magnum, “I know what you’re thinking. You’re thinking, ‘But Bob, you’ve said eleven-teen times that the 1911 and the Hi Power are two completely different pistols that only share one common denominator: Their creator, John Moses Browning.’ Yes, that’s true. However, the same criteria that make the 1911 ideal for self-defense apply equally to Browning’s venerable Hi Power.
In keeping with the same ballistic-oriented, brass-tacks approach, I’ll take it one step farther and add since this pistol’s purpose is self-defense, only accessories designed to enhance the pistol’s specific purpose should be used. But that’s not to say aesthetics shouldn’t be a factor. If you want to use a particular pair of grips simply because you think they look cool, that’s fine. The mistake comes if you allow the pistol’s “wow-factor” to overshadow its specific purpose. In an effort to narrow the search to solely mission-specific accessories and parts, I decided to focus primarily on parts designed to enhance the pistol’s reliability, accuracy and function, which forced aesthetic elements to take a backseat.
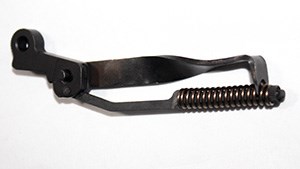
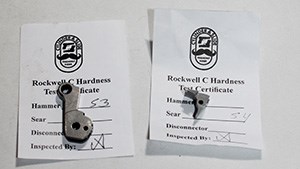 Having a pistol with a good trigger pull doesn’t necessarily mean your pistol’s trigger needs to be replaced. While I love the platform’s OEM trigger with its iconic curved shape and framed by its curvaceous trigger guard, I wasn’t opposed to replacing it. However, I knew from my experience tinkering with 1911s, that replacing other fire-control components like the hammer, sear and hammer/mainspring would garner the result I was looking for. To accomplish this, I selected a Cylinder & Slide BHP Chamfered Commander Hammer/Sear Set. By choosing a matching hammer and sear, you ensure that the critical bearing surfaces between the part are perfectly machined (or mated) to one another. Another added benefit can be seen in the hammer’s design.
The size of the hammer’s ring (or Rowel) has been reduced to be the same as on a Colt commander hammer and has been raised as high as possible, reducing the likelihood of hammer bite—a phenomenon that has plagued certain Hi Power owners for decades. While I’m fortunate enough not to count myself as one of the unfortunate ones, the change in design resulted in the part having less mass than the OEM hammer, which contributed, in part, to a lighter trigger pull. The addition of a reduced-power main (or hammer) spring would also help achieve the goal—without sacrificing the pistol’s overall reliability.
Much like removing the Hi Power’s trigger pin for the first time, removing the pin to swap the hammer can be just as challenging due to the pin’s ultra-tight fit that binds the hammer to the strut. Moreover, one side of the pin (typically the right side) is flared, staking it in place and adding to the challenge. Place the hammer, right side down, onto either a bench block or your workbench. One possible method of lessening it involves using a No. 2 center drill on the staked side of the pin to the remove some material before attempting to drive the pin out using a 5/64-inch punch. Once it’s out, add the strut assembly to the new Cylinder & Slide Hammer, returning both to either the bench block or the workbench and re-install the pin from the opposite side.
Replacing the pistol’s OEM 32-pound hammer/ mainspring with a BH Spring Solutions 24-pound main/hammer spring reduces the effort of cocking the hammer when racking the slide, while simultaneously reducing the impact on the hammer/sear relationship and ultimately reducing trigger-break weight.
 Unlike the 1911, in which the hammer and mainspring are separate, the Hi Power’s hammer-strut assembly is one piece (or monolithic), as the hammer/mainspring is integral to the hammer strut and attached via a thumb nut that allows one to adjust the tension with a twist of a pair of needle-nose pliers and a roll pin that hold everything together. Since everything is contained in a monolithic unit, swapping out the majority of the essential key components is easy, thanks to another godsend of an aid from BH Spring Solutions: its Main Spring Tool. This mechanical marvel allows you to safely compress the mainspring while removing the mainspring.
To use the tool, place the post of the Main Spring Tool into the large hole in the hammer. Once the hammer is completely in place, rotate the tool so the end of the tool so that its forks are in line with the mainspring—so that approximately two coils separate the forks from the hammer-strut nut—and press downward on the tool to lock the forks onto the strut and between the two exposed coils.
While maintaining the compression, use your other hand to rotate the hammer-strut nut a few turns clockwise with a pair of need-nose pliers—just enough to reveal the strut’s roll pin. Drive the pin out and set it aside. Now, back off the spring tension by rotating the hammer-strut nut a few turns counter-clockwise to remove the nut from the strut.
Once the nut is removed, remove the hammer from the tool, slide the OEM mainspring from the strut, set it aside and install the reduced-power hammer/mainspring onto the strut.
Replace the hammer onto the tool, placing the so that its forks are in line with the mainspring—so that approximately two coils separate the forks from the hammer-strut nut—and press downward on the tool to lock the forks onto the strut and between the two exposed coils. Reinstall the nut onto the strut, rotate the hammer-strut nut a few turns clockwise with a pair of need-nose pliers—just enough to reveal the strut’s roll-pin hole and replace the pin. Remove the tool. Your hammer-strut assembly is now optimized for a lighter trigger pull, while making the pistol easier to cock while simultaneously reducing the risk of hammer bite.
In the next installment, we’ll reveal an alternative to the OEM trigger.